
Logging in with a Magic LinkRequired
No password needed. We email you a one-tap link to sign in.
- 1
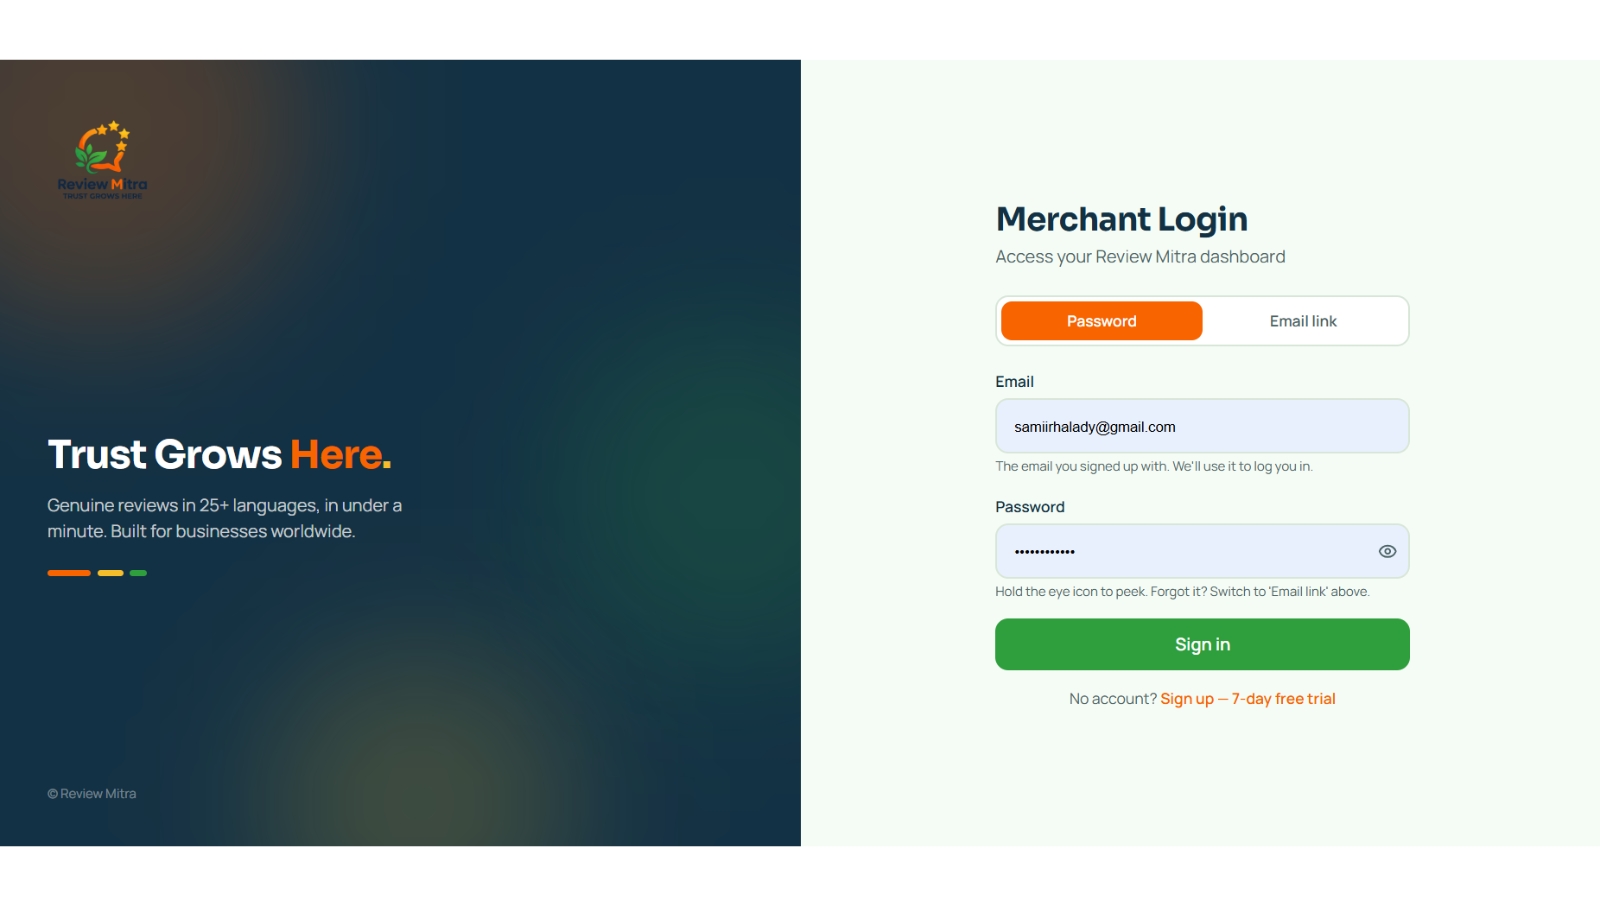
Go to the login page
Open reviewmitra.co.in/login and type your email.
Screenshot[ Login screen ]Replace this block with your actual screenshot - 2
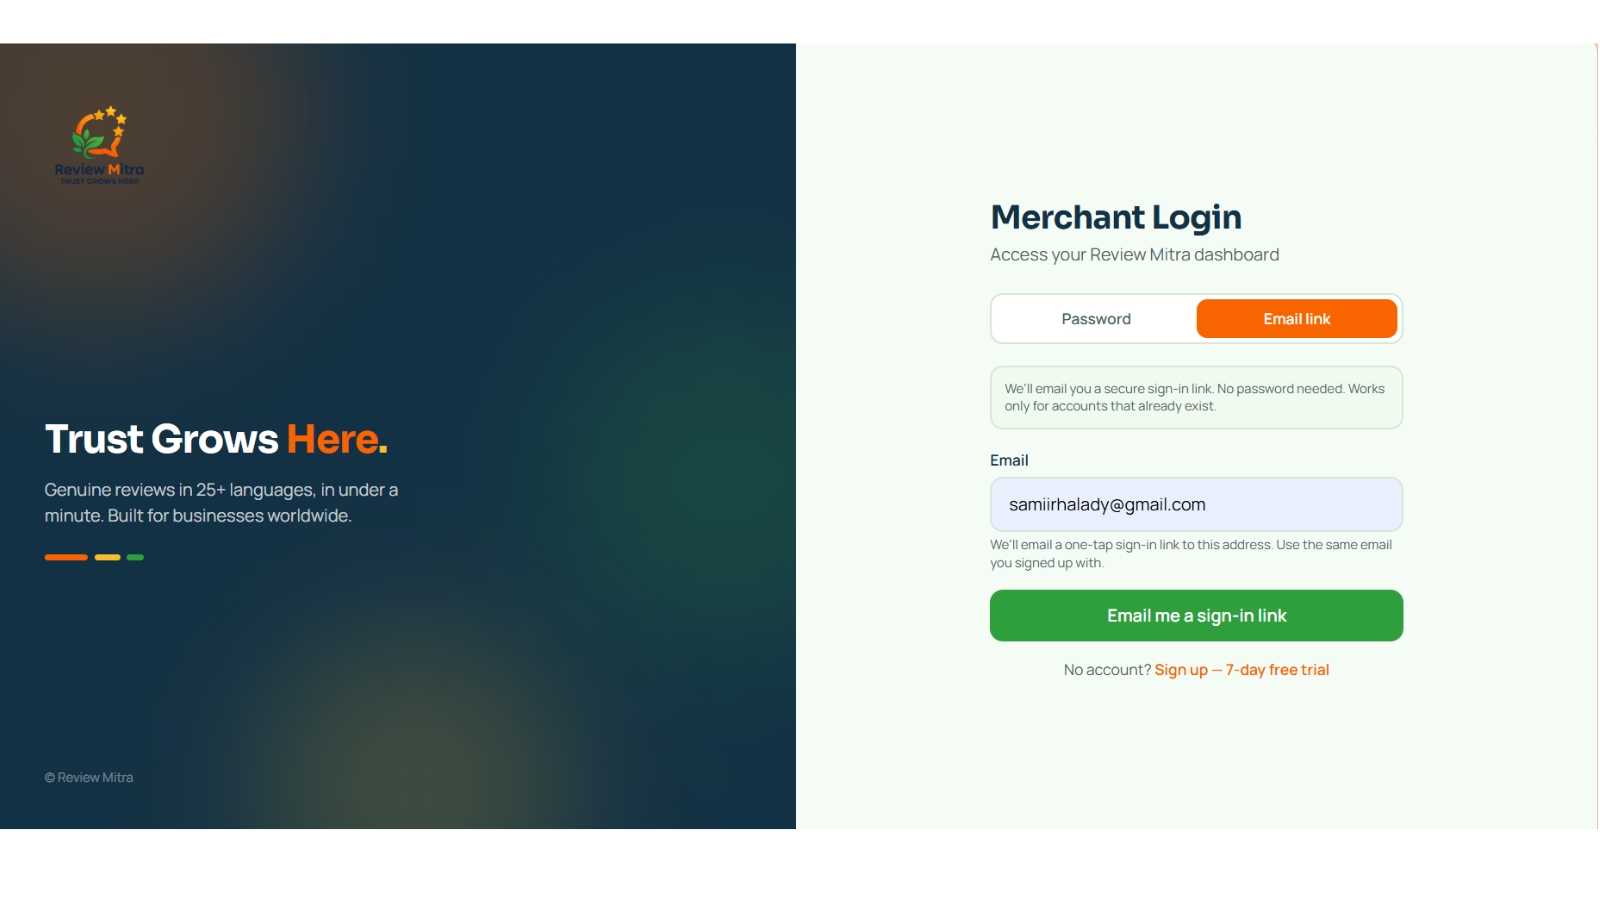
Tap 'Send Magic Link'
We send you a sign-in link in a few seconds.
Screenshot[ Send magic link button ]Replace this block with your actual screenshot - 3
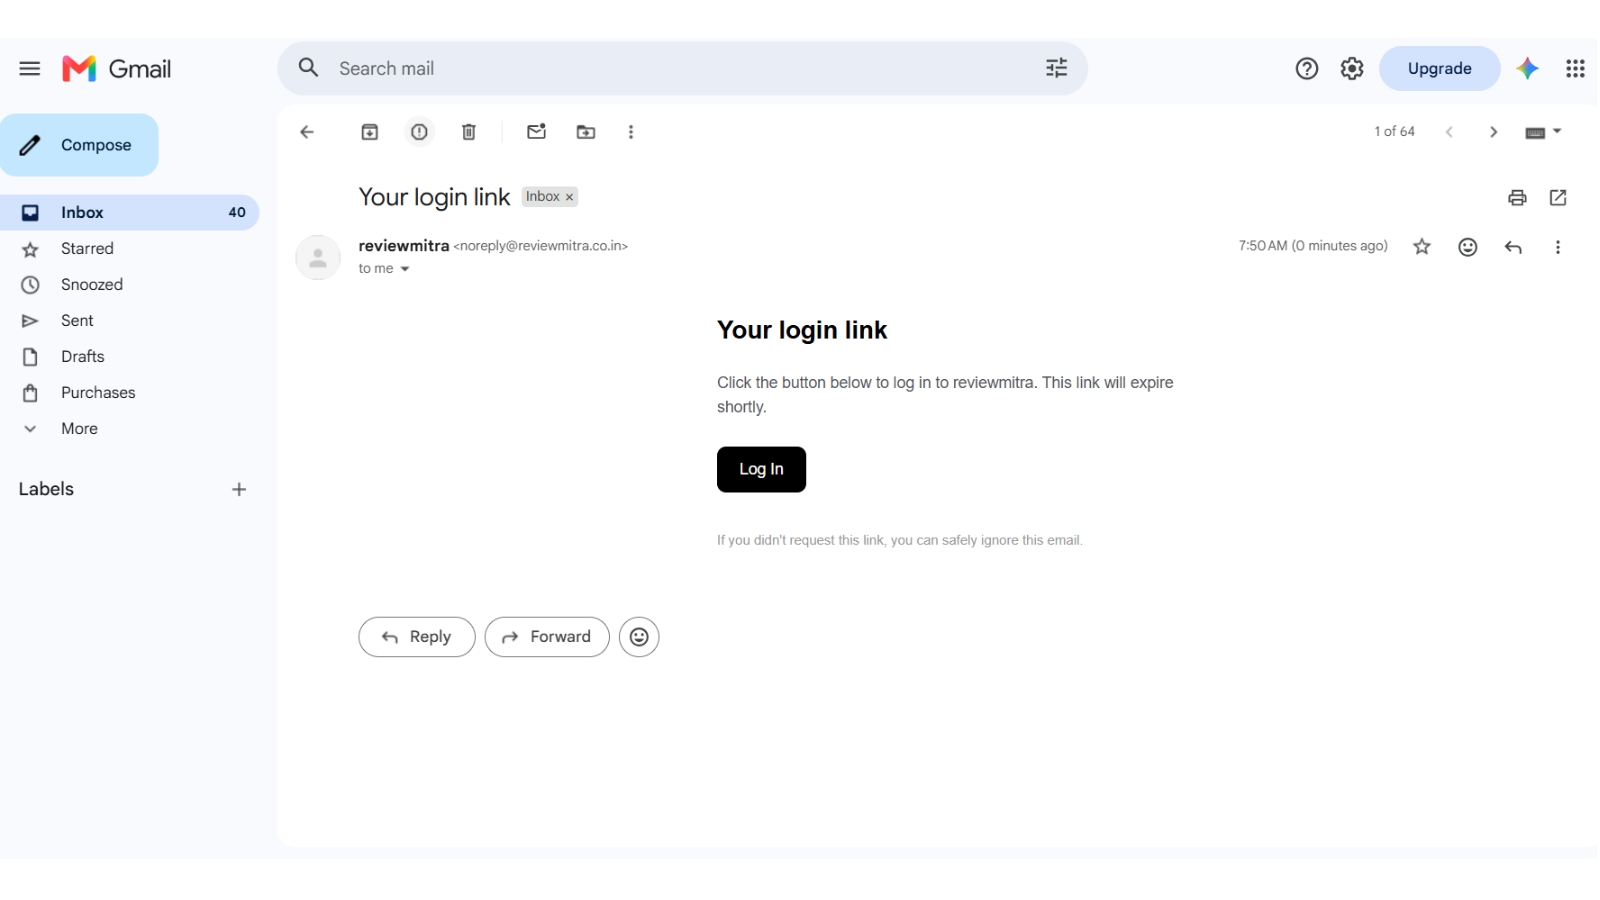
Open the email
Check your inbox. Not there? Look in Spam or Promotions.
Screenshot[ Email from Review Mitra ]Replace this block with your actual screenshot - 4
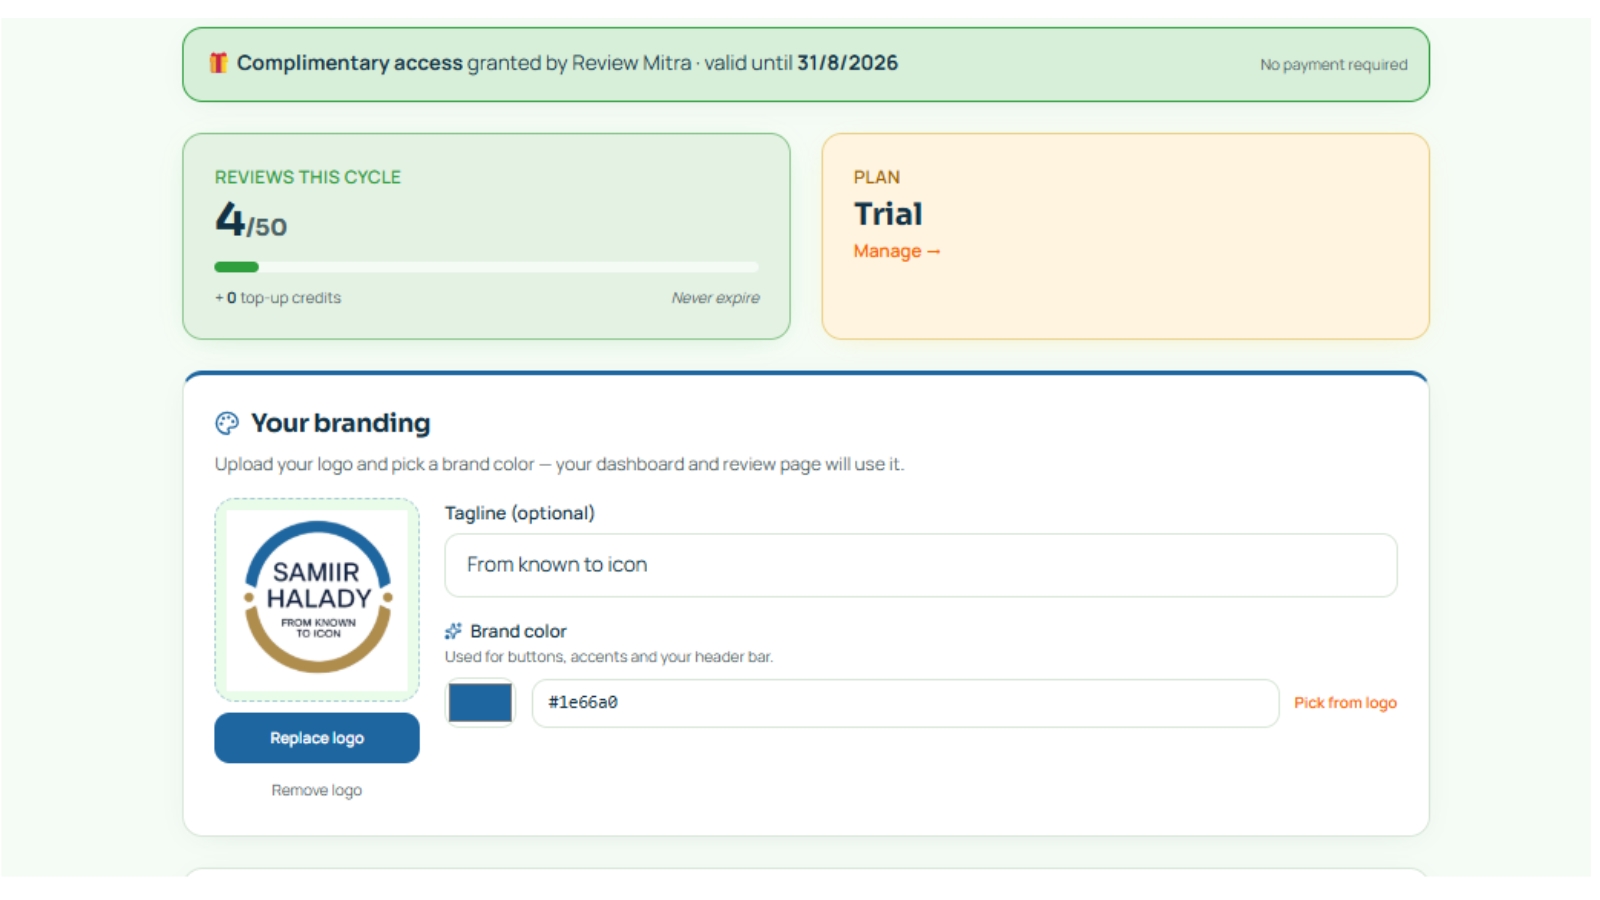
Click the link
You're in. The link works for 15 minutes only.
Screenshot[ Dashboard after login ]Replace this block with your actual screenshot
Add your Google Maps linkRequired
This is the only must-do step. Paste your Google Maps link so customer reviews land on your listing.
- 1
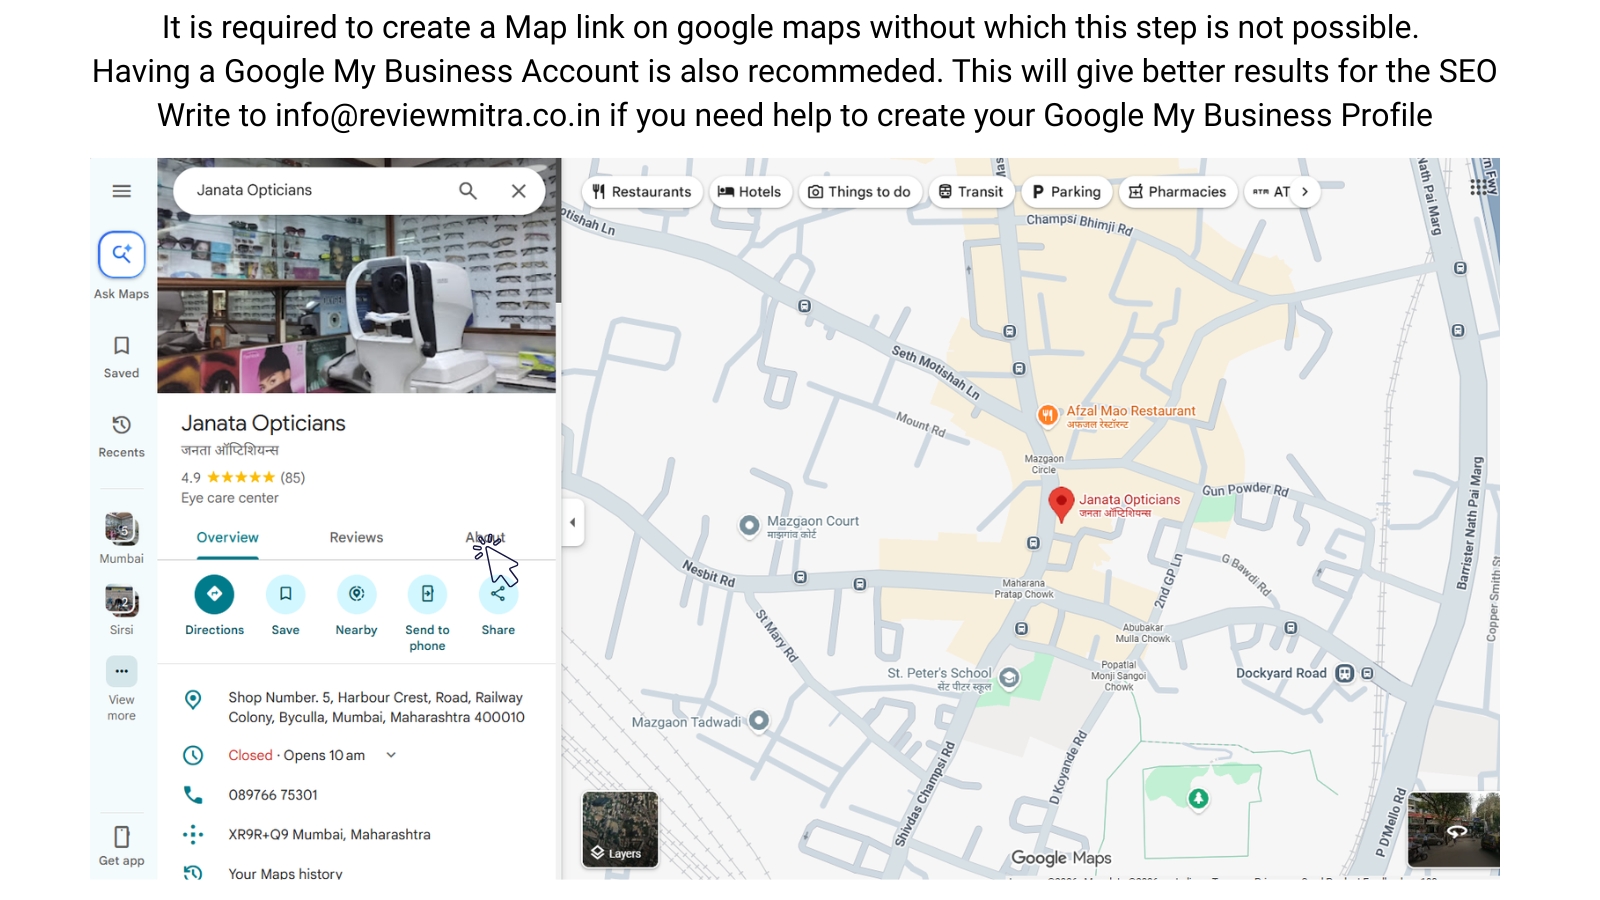
Open Google Maps
Search for your business on Google Maps (phone or laptop).
Screenshot[ Google Maps search ]Replace this block with your actual screenshot - 2
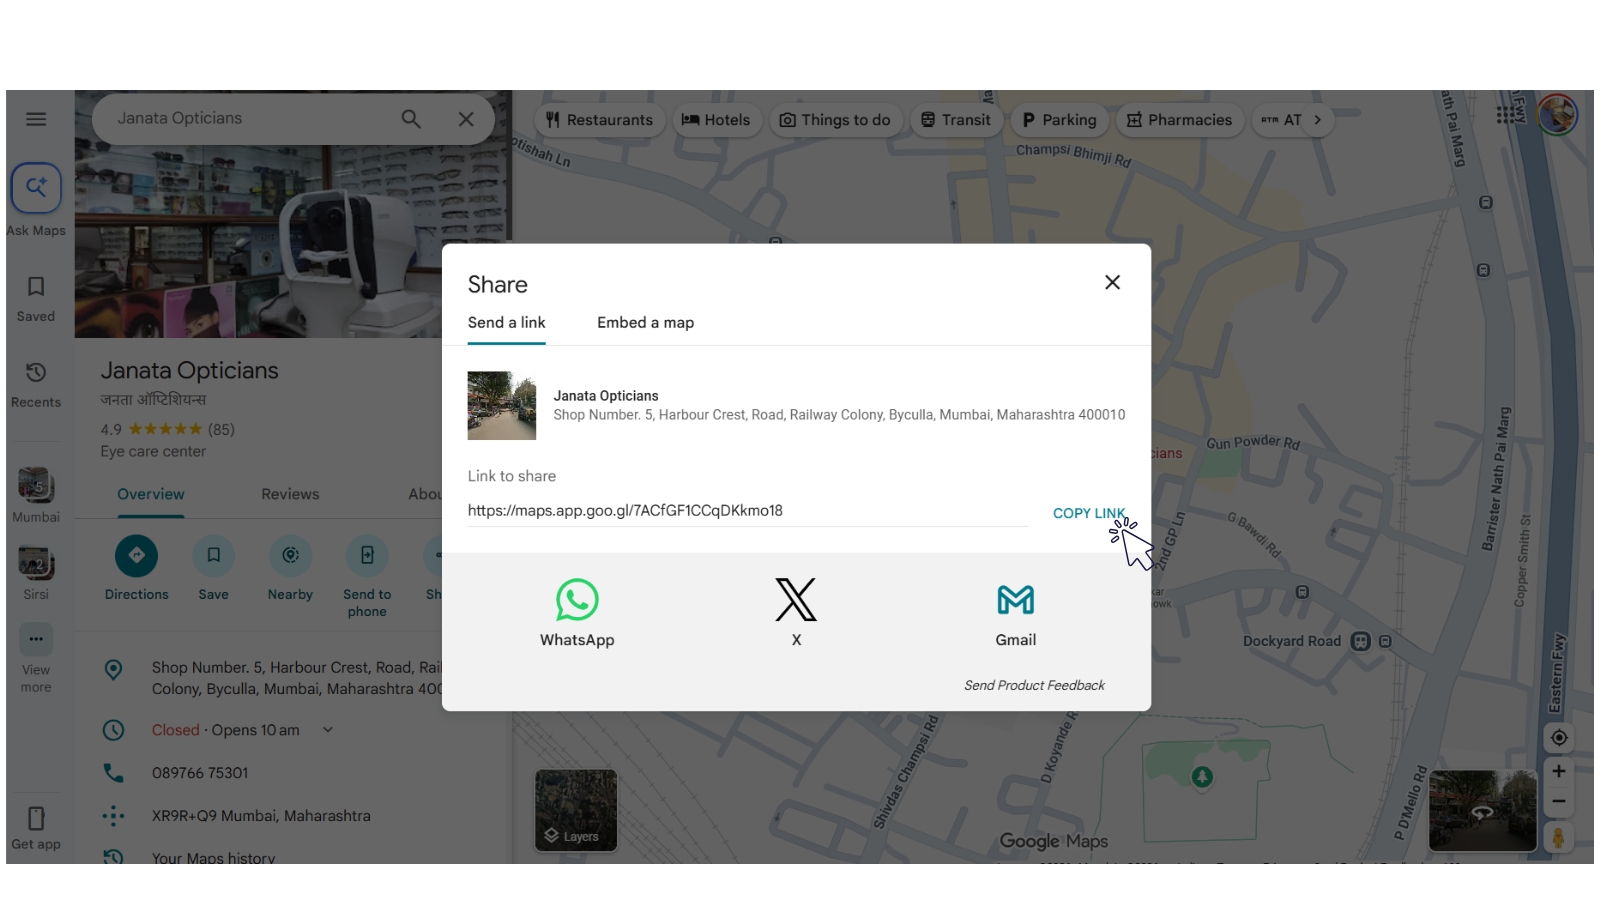
Tap Share → Copy link
On your listing, tap the Share button, then 'Copy link'. You'll get something like maps.app.goo.gl/…
Screenshot[ Share button on Google Maps ]Replace this block with your actual screenshot - 3
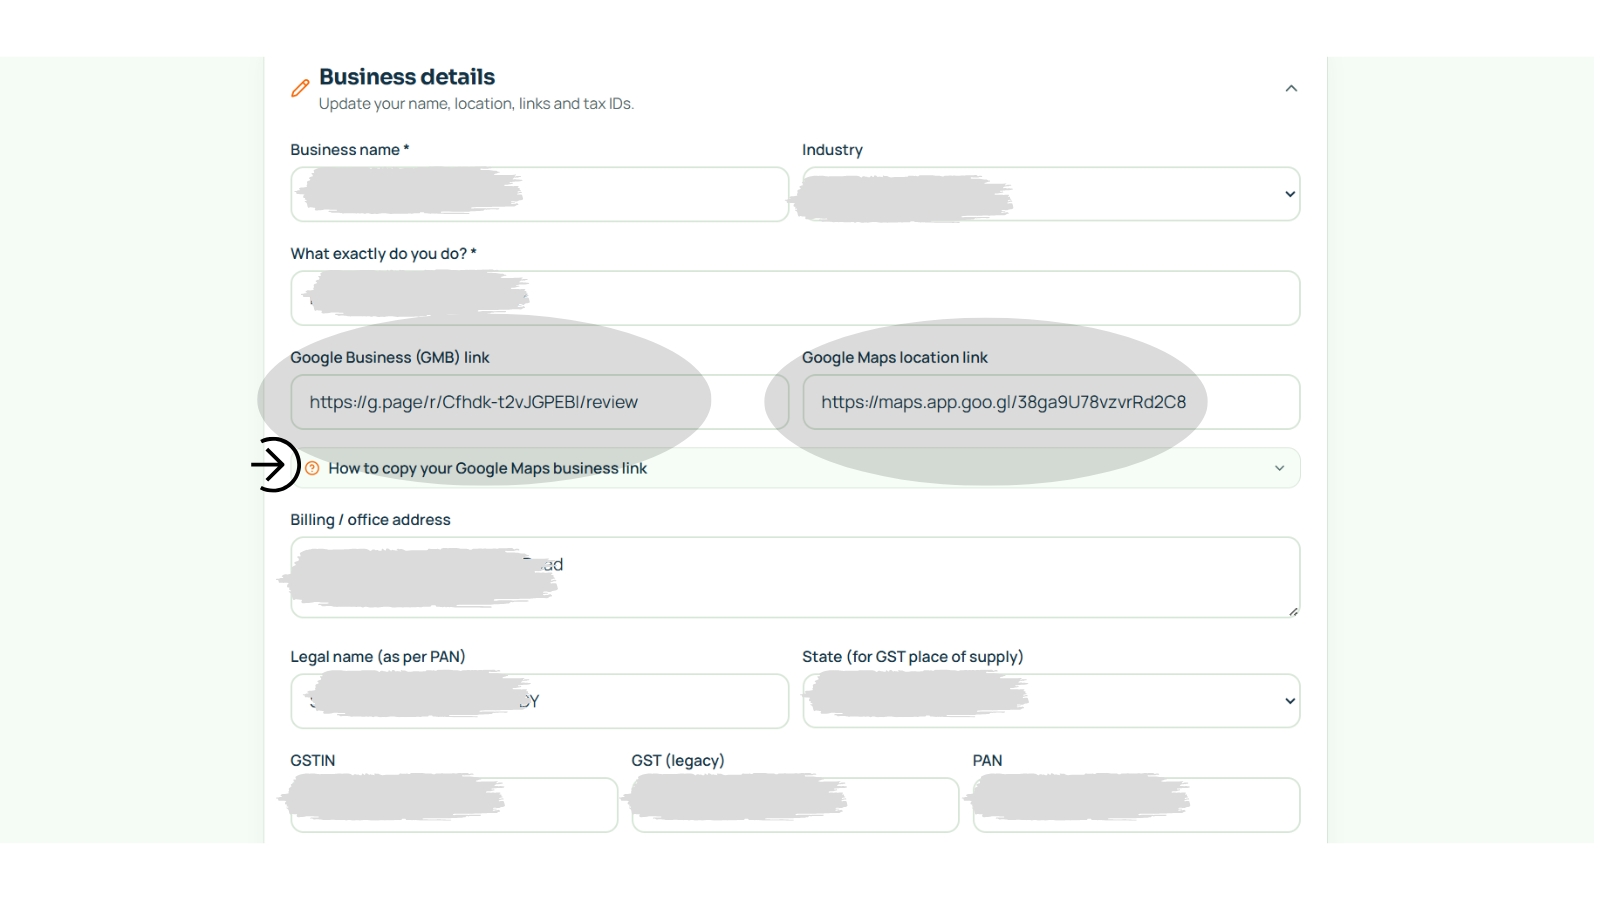
Paste it in Review Mitra
During setup (or in Settings later), paste the link into the 'Google Maps location link' field.
Screenshot[ Maps link field in setup ]Replace this block with your actual screenshot - 4
Done
Customers who scan your QR will now land on your Google review page.
Screenshot[ Setup complete ]Replace this block with your actual screenshot
Print your QR review flyersOptional
Optional but recommended. A printed QR on every table = a lot more reviews.
- 1
Open the QR Flyer card
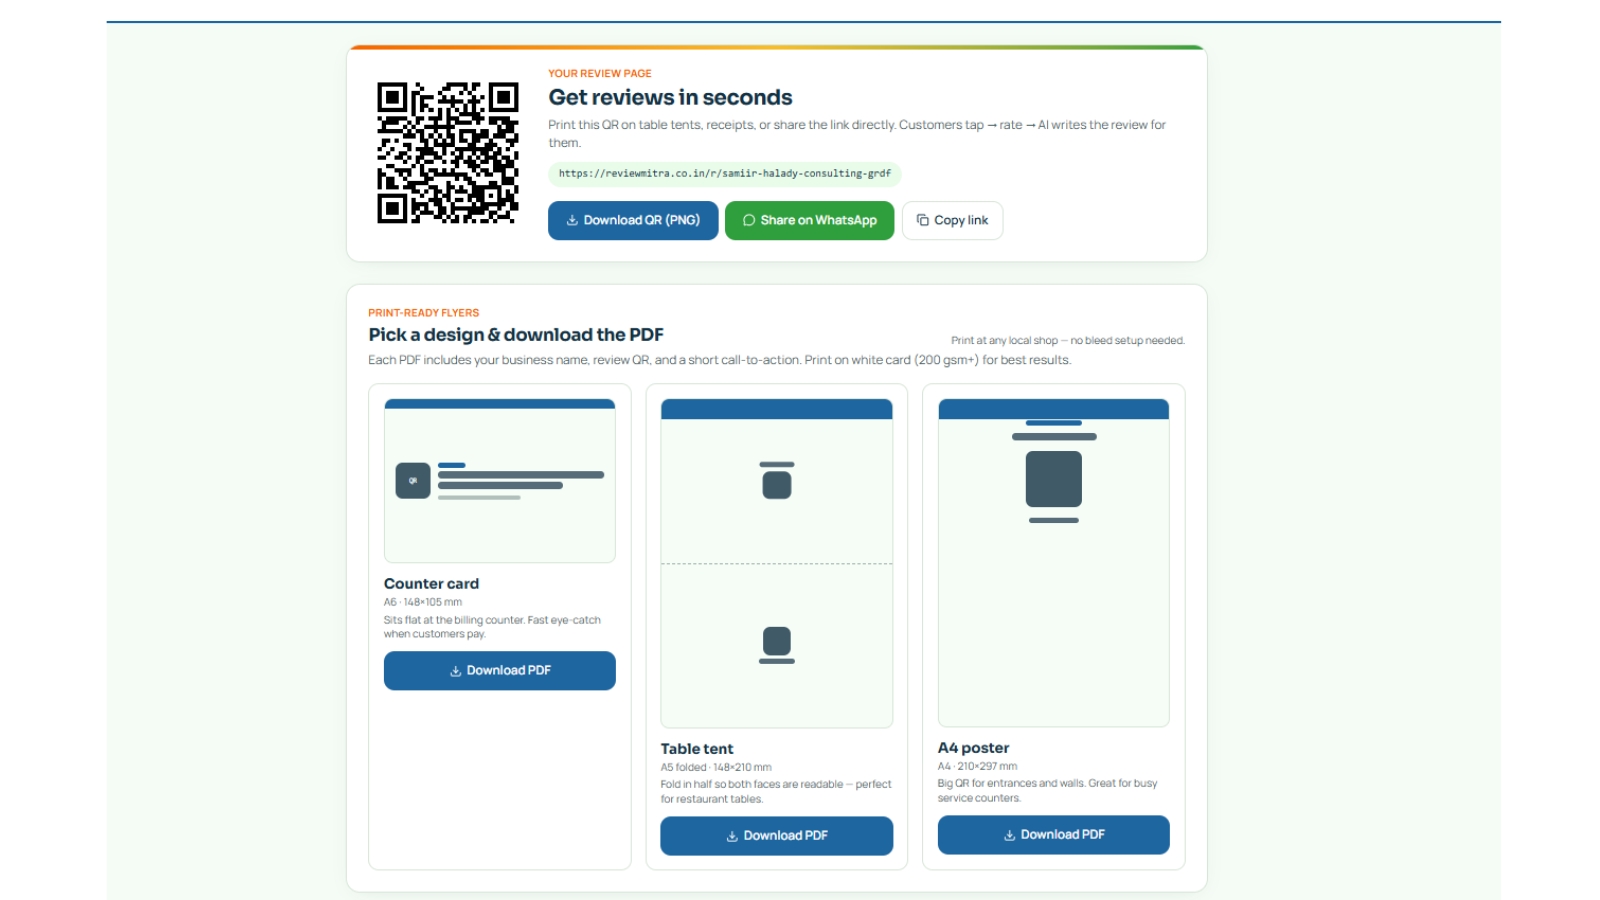
On your merchant dashboard, scroll to the 'Print-ready flyers' card just below your QR.
Screenshot[ Print-ready flyers card ]Replace this block with your actual screenshot - 2
Pick a design
Three ready designs: Counter card (A6), Table tent (A5 folded), A4 poster. Pick the one that fits where you'll put it.
Screenshot[ Flyer designs ]Replace this block with your actual screenshot - 3
Download the PDF
Tap 'Download PDF' on the design you want. The file is print-shop ready — no bleed setup needed.
Screenshot[ PDF download ]Replace this block with your actual screenshot - 4
Print and place
Print on 200 gsm+ white card at any local print shop. Put the counter card at billing, table tents on tables, poster at the entrance.
Screenshot[ Printed flyer ]Replace this block with your actual screenshot
How to add the screenshots
Every step above shows a dashed "Screenshot" placeholder. Here's the fastest way to fill them in.
- Open Review Mitra in a desktop browser and go to the exact screen listed below.
- Take a screenshot:
- Mac:
Shift + Cmd + 4, then drag the area. - Windows:
Win + Shift + S, then drag the area. - Phone: use your usual screenshot shortcut, then crop.
- Mac:
- Save as PNG or JPG. Recommended size: 1600 × 900 px (16:9), max 500 KB. Anything close to that works — the guide uses a 16:9 frame.
- Email the files to info@reviewmitra.co.in with the subject "Guide screenshots", naming each file with its slug from the checklist below (e.g.
02-magic-link-button.png). We'll drop them into the guide and publish within one working day.
01-login-screen.png02-magic-link-button.png03-email-inbox.png04-dashboard-home.png05-google-maps-search.png06-maps-share-copy-link.png07-onboarding-maps-field.png08-setup-complete.png09-qr-flyer-card.png10-flyer-designs.png11-flyer-pdf-download.png12-printed-flyer.pngPrefer to add them yourself? You can also drop the files into src/assets/guide/and tell us — we'll wire each image into the matching step.
Still need a hand?
Email us and we'll reply within one business day.
info@reviewmitra.co.inTap to open your email app, or copy the address above.